Tuesday, January 14, 2014

Best lunch in the Oliver area

Today I needed a quick lunch. Something to give me a break from the office and  that was not mainstream.  The Elm Café was perfect.  A salmon sandwich that was delicious and fresh you could say it hit the spot. And I must not forget to mention the latte... wow. You better get in there and try one. Great espresso and sweet milk = one perfect latte to warm me right down to my toes.
The rest of the menu looked quite interesting too. Fresh salads and there was a hearty pulled pork sandwich that sounded good too, hopefully it will be on the menu next time. And they are open for breakfast too with 2 delicious breakfast sandwiches. 

All in all a great little gem in the neighbourhood. Thanks for the great lunch Elm Café

Wednesday, July 10, 2013

A Regional Canadian Food: Edmonton


Here is the second installment to the Canadian Food Experience Project, this month's topic is Regional Food. This project is all about bringing Canadian food bloggers together to share their unique food experiences.
I must admit that this topic was a tough one, I began to think of my family and our local traditions; what is special about them and what food do we typically enjoy at these times. This year at Easter, we had brunch with my family, there is something about spring and brunch that go together just perfectly. For this brunch, I made a Brunch Bake that was filled with the fresh and bright flavours of spring. Originally, I found this recipe on the Kraft Foods website, there they call it the Sky-High Brunch Bake and of course I did a bit of recipe remodelling with the addition of fresh asparagus and dill and I used farm fresh eggs. The recipe and photos may look a little daunting as the assembly is a bit specific, but trust me when I say it is well worth all the effort and attention to details! As I am writing this I am thinking of when I will be able to make this again. It is a very memorable dish, one that the crowds will always be asking for time and time again.


Here is my version of the Brunch Bake. (serves 4-6)

  • 1 pkg. frozen puff pastry (2 sheets), thawed
  • 6 local farm fresh eggs, beaten
  • 1 cup ricotta cheese (if you can do homemade ricotta, all the better!)
  • dash hot pepper sauce
  • 2 pkg. frozen chopped spinach, thawed, well drained
  • fresh dill, chopped
  • 4 slices bacon, cooked and chopped
  • 1-1/2 cups shredded cheddar cheese (or any local sharp cheese)
  • 1 cup chopped red peppers
  • 20 lightly blanched asparagus, trimmed to radius of spring-form pan

    • Unfold pastry sheets. Roll out 1 sheet to 11-inch square; set aside. Roll out remaining sheet to 12-inch square; use to line bottom and side of 9-inch spring-form pan sprayed with cooking spray.
    • Reserve 1 Tbsp. eggs. Mix remaining eggs with ricotta, pepper sauce and spinach. Layer half each of the bacon, cheese, ricotta mixture and peppers in crust. Repeat layers, ending with the asparagus arranged in a star-burst on top.
    • Cover with remaining pastry sheet; folding remaining pastry around edges of pan. Brush pastry with reserved egg. Cut slits in top crust.
    • Bake 45 to 55 min. or until golden brown. Cool 10 min. Run small knife around edge of pan to loosen crust before removing rim.


    Easter 2013: Brunch Bake


    Friday, June 7, 2013

    My First Authentic Canadian Food Memory


    The Canadian Food Experience Project begins today, June 7 2013! As we (participants) share our collective stories across the vastness of our Canadian landscape through our regional food experiences, we hope to bring global clarity to our Canadian culinary identity through the cadence of our concerted Canadian voice. Please join us.


    I am so excited to take part in this 13 month challenge, this is a wonderful opportunity to share my own Canadian Food Experiences.  I would like to take this moment to thank Valerie at A Canadian Foodie for putting the word out to so many Canadian food blog writers to come together to share their stories and experiences. This is going to be a great 13 months.

    I hope you enjoy my experiences that I am about to share with you, read on for my First Authentic Canadian Food Memory!

    Let me start by setting the scene… a log cabin, built by hand and heart, in the woods with an old wood burning cook stove. Some would call this very rustic or rough but to us it is warm, welcoming and so very familiar. The cabin is a place where we go to relax, unwind and recharge. There are plenty of quiet and peaceful moments as well as many memories made with family and friends as we gather together regardless of the season. And with any home, the kitchen is a meeting place for all and the cabin is no exception to this. I believe that it must be the warmth of the cook stove that draws everyone in or possibly it is the delicious meals that are created here, one or the other it really equals the same; a great place to be.

    When I was growing up, we always, and I do mean always, had homemade bread. It even got to the point of store bought bread was almost a treat… I know it is hard to believe.  I realize now, after a few years of not having a constant supply of fresh homemade bread, what everyone loved so much about this fresh bread, what they tasted and how it made them feel.  It is so hard to describe but the best word that comes to mind is; Love.  This bread has always been made by my Mom and yes, I have the recipe but it doesn’t turn out quite the same. When Mom makes it she puts Love into it, I am sure it is the next ingredient that she adds, right after fresh ground wheat, patience and understanding.

    There have been so many weekends that Mom has made fresh bread in the morning that is just coming out of the oven at lunchtime. There is something different about the heat from a wood burning oven and the effect it has on our baking, especially breads, the crust is crunchy but still tender and the inside of the loaf is so soft with an amazing crumb texture. If you ever have the chance to enjoy fresh, warm bread from a wood burning cook stove, I suggest that you stop to enjoy and take the time to find the fresh ground wheat, patience, understanding and love that has been baked into this loaf of bread.

    You may ask; what makes this my First Authentic Canadian Food Memory? I could simply say that it's the Alberta grown wheat but that is really too simple. Instead I believe that it is the fact that I am a true Canadian and I am proud to say it. Nestled deep in the woods in northwestern Alberta in the Woodlands County, the cabin has been our rustic weekend home for so many years and it will continue to be this as our families change and grow. It is a place where many memories have been created and so many wonderful meals have been lovingly prepared and enjoyed in the good company for family and friends. 

    This recipe starts out with local wheat that is freshly ground and finishes as a beautiful loaf that gives us so much more than nourishment in our bellies. It fills out hearts with love and our minds with memories that stay with us forever.


    Wednesday, June 5, 2013

    Coming Soon

    New and exciting things are happening around here... stay tuned for details of an upcoming challenge.

    Sunday, April 29, 2012

    The Best Cinnamon Bread

    I love magazines.  Fashion, Fitness and Food magazines are my favourite.  A really great cooking magazine is Cook's Illustrated.  It is filled with very technical recipes with tons of great information on the how and why, which fills my curiosity and answers all my how and why questions!

    In the April issue I found a few recipes to try and so far I have made two of them and they turned out perfect.  My favourite one was the Cinnamon Swirl Bread, it made a light bread with lots of cinnamon flavour and no gaps in between the layers of bread.  I started making it at 4pm on a Wednesday night and I was able to sit down with a slice and a cup of tea at 10pm.  I know you are probably thinking who wants to spend that many hours baking bread?!?  Well, let me tell you... it is well worth it!

    ... I just went and had a slice for inspiration...
    It tastes so amazing, you can't even buy cinnamon bread that is this good.
    The end result was a rustic looking braided loaf, (actually it made 2 loaves but one was a taste test subject and therefore did not make the photo shoot) that was filled with cinnamon sugar and lots of raisins.  

    For those of you out there who wrinkle your noses at raisins, you really must re-think your relationship with raisins for this cinnamon loaf.  They really do make the bread extra special.  And you know who you are... B.

    I would have taken the time to write out all the steps to make this amazing bread but I really have to give the recipe writing credit to Cook's Illustrated and let them share the recipe with you.  Head over to their website and you can get all the info and so much more there!  


    If you love cinnamon as much as I do, you will enjoy every last crumb of this Cinnamon Swirl bread.
    That's all for now, see you around in the kitchen.

    E


    Sunday, February 5, 2012

    Natural Energy bars

    I am hungry right before my workout, but I don't know what to eat.

    My day is so busy, I am rushing from work to the gym and then off to pick up the kids.  What should I eat while dashing between all of this?

    Does any of this sound familiar?

    There seems to be so many different energy bars, bites, cookies, you name it on the market these days.  And if you read the list of ingredients there are many items that either you can hardly pronounce or they are not really 'food'.  I like to enjoy real food; food that is simple, with names that I can pronounce and food that is created in my kitchen.  Another bonus to making your own energy bars at home is the cost!  Would you rather spend $3 on one energy bar with ingredients that are chemically enhanced or spend $15 and with a great afternoon in the kitchen and get 25 energy bars?!?  Yes, my thoughts exactly.

    There are a few different recipes out there for energy bars, each one with its own claim to fame and benefits.  I like to keep it simple, healthy and delicious.  A small energy bite that is low fat, low in processed sugar and high in protein.

    Here is my version of an energy bar, bite, cookie or whatever you want to call it.
    I like to call them Ella bars and to be seasonally festive I have cut them into heart shapes.  Cute, I know.

    Fruit & Nut Ella bars

    1 c. chopped, toasted pecans
    12 oz (about 2 c.) dates
    6 oz (about 1 c.) dried fruit (cherries, cranberries, apricots)
    2 T chia seeds
    1/3 c. peanut butter (melted)

    Using your trusty food processor chop the dates and dried fruits together.  Then add in the toasted pecans and process until the nuts are evenly minced.

    Heat peanut butter over medium heat until it is soft and runny.  Add chia seeds to nut and dried fruit mixture and pour in melted peanut butter.  Gently mix all together and press evenly into a pan lined with plastic wrap.

    Chill until firm and cut into bars (or shapes).  If you use a cookie cutter to make your shapes, you can roll the leftovers into balls!  Store in a covered container for 1 week, or keep in the fridge for up to 2 weeks.  You can also wrap each bar individually and freeze for up to 3 months.

    Here are a few benefits to these wonderful Fruit & Nut Ella bars;
    - great source of protein in the peanut butter & pecans
    - healthy antioxidants found in the dried cranberries
    - at least 30% of your daily iron requirements in the dried apricots and cherries
    - chia seeds are a superfood filled with omega-3s and calcium


    Now that I have the perfect snack, it is time to plan a new workout.  Who would have thought that food could inspire a new and exciting workout...?  Around here anything is possible.


    That's all for now, see you around in the kitchen.


    Sunday, January 22, 2012

    Sunday lunch

    Napoli salad and sweeeet BBQ chicken pizzetta.

    What a perfect day.

    Sunday, January 15, 2012

    the Last Supper

    Whomever coined the phrase "all good things in life must come to an end", really knew it all.

    Here is a healthy, delicious supper that C and I enjoyed on our last night together in Edmonton.  I am not going to go on and on about C leaving... I really don't want to get a  teary and sad.

    So instead I will go on and on about the food instead.

    I have this cookbook called frame>by>frame - quick and easy by Parragon Books.  It has beautiful photographs - which is imperative to a great cookbook.  And the recipes are all photographic, quick and easy with simple and healthy ingredients.  The recipe that gave me the inspiration for our Last Supper was the steamed chicken with chile & cilantro butter.  Of course the recipe was only an inspiration or a guide and we therefore made it our own with what we had on hand.

    We have this enormous tub of dried wild mushrooms, and seeing that C loves mushrooms...
    For a side we made a pilaf from a blend of brown and wild rice with the usual onion, garlic and these wild mushrooms.  It was actually really good!    The rice needed about 55 minutes so we enjoyed foie gras on crackers and a great heart to heart visit.

    Once the rice was done we started the main.  While C sautéed the mushrooms, onion and garlic I started prepping the chile and cilantro butter and the chicken.  This recipe requires a bit of fussing but trust me.  The end result is great.

    Start by mashing together; minced garlic, minced cilantro, minced red chile (or a healthy pinch of chile flakes) and a pinch of salt in a few tablespoons of softened butter.  Allow this to sit for a few minutes for the flavours to develop.

    Prepare your steaming pan.  I used a metal vegetable steamer in a large straight sided saute pan with aluminum foil for a lid.  Pour enough water into the pan so it will not boil dry but it is not covering the bottom of the vegetable steamer.  Allow the water to come to a boil.

    Slice a pocket in the thickest part of each chicken breast and fill with the butter mixture.  Place each stuffed chicken breast in a parchment bag or wrap in parchment paper.  If you are wrapping in parchment paper, be sure to close tightly as there will be a little bit of sauce at the end of cooking that you don't want to lose.

    Arrange each packet on the vegetable steamer over the boiling water and cover with foil.  Steam for 18-22 minutes.  Try to keep the foil (or lid if you have one that fits) on tight through this time, as the more steam escapes the longer the chicken will need to cook.

    For our vegetable sides we had baby carrots and a fresh green salad (not shown) with homemade dressing.

    All was simple and perfect.


    This dinner really marked the end of one era and the beginning of a new one.  I am so very thankful to have had so many wonderful moments with C (& B too), I will remember and treasure each and every one of them.

    C - at least we will have facetime, emails and airplanes.  :)


    That's all for now.  See you in the kitchen.

    Saturday, December 3, 2011

    Mmmm..... Affogato

    Canadian maple gelato with essssspresssoooo!

    Amazing is what I call it.

    Sunday, November 27, 2011

    Edmonton's Tres Carnales Taqueria

    Are you wondering about that last photo I posted on the go?

    Well... wonder no more.  There is this tiny little restaurant downtown that we went to on Saturday night.  Tres Carnales Taqueria is (and I will quote their website) "an authentic street food joint" with tons of personality, flair, great food and of course, cold Coronas!

    If you are looking for a quiet dinner experience ... this is not the place BUT... if you are looking for a super fun and unique dinner experience this IS the place.

    I had the Al Pastor - 4 little tacos of marinated slow roasted pork.  You may think 4 little tacos... but honestly with the amazing Guac and house made chips it is a complete meal that you and your jeans can feel good about.  Perfect portion sizes and as I mentioned before, cold Coronas. The photo attached here is the paper cone that the house made chips are in. Such a cool looking stamp.

    I can't forget to mention the hospitality.  As it was a Saturday night there was a line up but who minds waiting for this kind of food and especially when you are treated as well as we were in line!?!
    Thanks Tres Carnales!

    This is a bit of a weird tangent for me... raving about a restaurant but really it was that good.  :)  Maybe this will spark a habit...?  I still really love cooking and blogging about my cooking.
    Who knows.  We'll have to see.


    I am now buried deep under my cookbooks searching for the perfect Christmas cookie recipe.
    See you in the kitchen.

    Saturday, November 26, 2011

    A taco massacre

    Taqueria tres carnales

    Monday, November 7, 2011

    Chia Seeds

    On Pinterest I saw these delicious looking energy balls (Originally posted on Pinterest by Smashed Peas and Carrots blog) and I thought... I can make those with my own twist!

    Yes, even snack foods get to be served in Sophie.


    So here is my twist; because someone (you know who you are... B!) doesn't like coconut I had to replace it with something.  And something healthy too, why not try Chia Seeds!  Healthy and a great source of omega 3s, maybe even better than coconut.

    Here is my version of the recipe.
    1 1/2 cup oats
    3/4 cup chia seeds
    1/2 cup ground flax seed
    1/2 cup chocolate chips
    3/4 cup peanut butter
    1/3 cup honey
    1 tsp vanilla

    Mix all dry ingredients together, heat peanut butter, honey and vanilla until it is almost runny.
    Combine wet onto dry and mix well.  Form into 1" balls and chill.

    They are a tasty little snack that gives us a bit of energy to get through the last part of the work day.
    Tomorrow I will be trying this at 2pm!


    Sunday, November 6, 2011

    One Day of Harvest

    Seeing that snow is starting to come into the forecast I thought it would be nice to see one last bit of summer. 

    This year was amazing for our tomato crop. I have no idea how or why but this was the tomato year and we are not complaining! Just eating lots of tomatoes. 

    And I am still trying to find new and exciting recipes for our bumper crop of tomatoes. 


    The tiny ones in the smaller bowl are called Red Currant Tomatoes, they are the size of a large pea and have more flavour than any tomato I have ever tasted.  A bit of a pain to pick as the plant was laden with hundreds of tiny tomatoes.  The Yellow Pear tomatoes that are shown in the larger bowl are sweet with a thin tender skin, wonderful in salads.  In that same bowl there are the Honey Bee yellow tomatoes, these are the sweetest tomatoes that I have ever tasted.  A thicker skin than the Yellow Pear but even sweeter.  They are amazing slow roasted as the sugars caramelize and the juices run out to make a beautiful sauce.  As well there are a few orange ones they are the Sweet Orange tomatoes, and their name is exactly what they are.  One of the best things about having so many small tomatoes is that when you are out to water or just to check the garden there are always a handful of tomatoes to snack on.  They are the ultimate healthy snack! 


    A question you may have is... what do I use as a fertilizer?  None.  The only reason for this is I never remember to actually fertilize. I have a good tomato fertilizer but the garden hose or a bucket dipped in the rain barrel is so much more convenient.  We do have a great compost bin that creates beautiful 'black gold' that we put on the garden in the spring as we are turning the soil over to prepare for planting but other than that it is just daily watering and talking to the plants.  I know that does sound a little crazy but it works as you can see. :)  


    Enough tomato talk for now, I need to look for more garden fresh tomato recipes!


    Monday, September 19, 2011

    Green Beauties

    Would you just look at these green tomatoes... amazing is what I would call them.


    Recently on GOOP (www.GOOP.com) there was a recipe for Fried Green Tomatoes.  (Thanks C!)

    It was quite an adventure, a little messy but well worth it.

    Here is the battering station.  I refuse to deep fry in the house so we put the side burner on the BBQ to good use.


    Start with seasoned flour.  Move on to egg and buttermilk and the last step is a mixture of cornmeal and panko bread crumbs.


    Cornmeal and Panko bread crumbs give a great crust with lots of satisfying crunch.

    The end result was a great new way to have tomatoes.  There was a slight 'lemony' flavour but there was no lemon in the recipe.  Weird... I know.  It's just the bright, acidic flavours of the unripe tomatoes.  Delicious is what I call it. 

    Something fun and different to try.  And don't knock it until you actually try it.  You could be surprised.

    That's all for now!

    E


    Thursday, July 7, 2011

    A Summertime Snack

    The Ingredients:
    White nectarine - diced
    Mango - diced
    A drizzle of anise flavoured honey
    A spoonful of creme fraiche
    A sprinkling of cinnamon

    The Setup:
    A warm sunny afternoon
    A nice patch of grass (with no Mosquitos!)

    Mix together and sit back to enjoy!

    Warning: may cause laziness or drowsiness. :)

    Monday, July 4, 2011

    Cherries and a wood burning cook stove

    So here I am sitting in front of a very hot wood burning cook stove (at the cabin) making dessert with my master baker (aka mom!).  Dessert tonight is cherry crisp.  Apple crisp is a bit more common but cherry is a favourite of ours.  We are using Evans cherries picked from the garden, that start out in a juicy sauce that thickens on the stove top. The base to the crisp is the standard oats, brown sugar, a bit of flour and butter of course!  And it all comes together perfectly in the dry heat of a wood burning cook stove. 

    The recipe is pretty easy... 
    Make a sauce with the cherry juice and a bit of corn starch and sugar.  Allow to simmer until thick and set aside.
    Mix together brown sugar, oats, flour and melted butter. 
    Pat some of the crumb mixture into the bottom if the pan and top with the cherries and thickened sauce. Top all of this with the remainder of the crumb mixture.
    Bake at 350-375 degrees for about 25 to 30 minutes. Just watch the crisp in the oven and it is done when it is bubbling around the edges and the top crumbs are nice and golden.
    Allow to cool and enjoy with heavy cream, ice cream or just plain.  If you like your cherries really sweet you could even top it with creme fraiche to help counterbalance the sweetness!

    Here are the photos...


    Cold cherry juice with corn starch and sugar heating till thickened

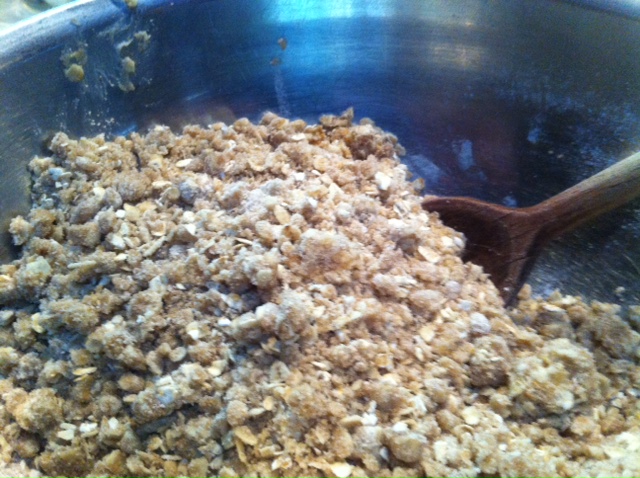
    Crumbs!

    Assembly time...

    Adding the third layer, more crumbs!

    Baked till golden and bubbly

    And now after all that I think I need a little taste of said cherry crisp and a cup of tea...
    See you all in the kitchen!

    E

    Wednesday, January 19, 2011

    A warm and cozy soup

    It's a cold and blustery day... Soup for dinner I say!

    There is my rhyme time and now about our soup. There has been much talk if this Pho soup, and being the adventure seeking chef I just have to try it. Very simple, delicious and it is healthy! Low in fat and salt. Read carefully as this next part is very complicated. **wink, wink!**

    For enough soup to serve 2 follow this: Shred the beef very thin *this is very important as the hot broth must cook the meat. Thinly slice carrots, celery, broccoli and green onion and set aside. For the noodles you could use any quick cooking thin noodle, have these ready in the bowls. Heat approximately 6 cups of homemade beef stock to a gentle boil, add in 2 teaspoons of sesame oil and the same amount of fish sauce. Once the broth is at a rolling boil quickly ladle it over the dry noodles, pile the shredded beef over the noodles and top with the vegetables. You can garnish with drizzle of soya sauce and some fresh chopped cilantro. Be sure to plunge the meat and the vegetables into the hot broth and enjoy!

    Sorry there are no photos- we were enjoying the soup so much that we didn't think to do a photo shoot! Maybe next time as this was a favourite soup.

    You should try this soup, there are tons of different modifications that one could do. You could add in shrimp, or what about fish instead of beef? Fish stock instead of beef stock? Or even vegetable stock could be a nice alternative. There is almost no limit!

    I think next weeks menu is calling for one of these delicious variations.

    That is all for now, see you in the kitchen!

    Sent from my iPhone

    Thursday, January 6, 2011

    Testing a new way to post on the go

    So I thought it could be so much fun to be able to post 'on the go'! Can't you see it now... In the cheese line at the Italian centre, picking out fresh ingredients at the farmers market! My options are endless now.

    And maybe even with new and exciting pictures too? I have attached a picture of our new years fondue for official test purposes and to give you a nice visual.

    Monday, January 3, 2011

    Soup that made my day!

    So I felt like making soup today for dinner.  What do I have in the fridge...?  Carrots, acorn squash, onions, home made chicken stock and ham sausage; and what all does this make?!?

    A fantastic soup!  First I roasted the carrots, squash and onion for about 1 hour.  Meanwhile I minced the ham sausage (you could use bacon or even deli ham or any smoked meat) and pan fried it to give it crispy edges.  Once the carrots and squash were all sweet and roasted I pureed them in the stock.  Mince the onion and add it along with the crispy ham sausage.  Something to remember is that once pureed the soup may get very thick, so add a bit more stock until it is the desired consistency.  Add in a few fresh herbs; I made a mixture of garlic, parsley, oregano and tarragon (carrots best friend).  Season with fresh pepper and sea salt and serve with a bit of toasted whole grain bread.

    It was so good I ate it all before I could even take picture!  Really, do you want to see an empty bowl?  There is nothing left - I was almost, almost tempted to lick the bowl clean it was the good.  (but I didn't do that.)

    I know you really want to see my empty bowl so here it is... It was that good.


    So that was Monday night dinner.  Mmmmmmm.